On the trail or in the arena, every rider wants a smooth gait and balanced movement in their horse. To achieve this, reining trainer Casey Deary suggests three steps to gaining collection.
A barrel horse, cutting horse or trail horse must collect to complete their respective jobs successfully. A collected horse carries itself better and thus travels at a smoother gait.
“Any horse with any job is going to operate better when collected,” says Casey Deary of Weatherford, Texas. “The hind end of the horse is the impulsion, and the front end is the steering. When the hind end and the front end come closer together, it makes the shoulders and back elevate and get round. The purpose of that is to help the horse carry more of its weight on its hind end, making it easier for it to go through any obstacle or maneuver.”
By changing the arc of a horse’s back and elevating the withers and shoulders, its head, neck and poll will naturally drop, Deary explains. This can create smoother stops and turns, and a more comfortable traveling gait.
“Pulling on a horse’s face has little to do with collection if there is no drive from behind,” Deary says. “In fact, without the drive from behind, or without a consistent barrier or pull, pulling on the face is detrimental to a horse’s collection. You can actually make a horse put its nose on its chest and not change the arc of its back. If you don’t change the arc of the back and [elevate the] withers, then you get no collection.”
A three-step exercise, done repeatedly, can aid in teaching your horse to drive from behind, or to collect. Deary works with most horses in a snaffle bit because a snaffle will put direct pressure on the bars of the mouth and has a faster reaction time than does a shank bit.
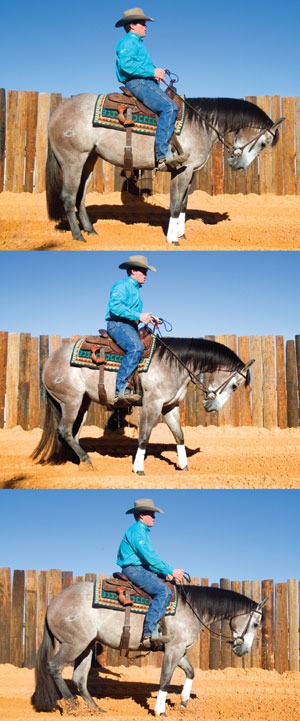
1. BACK OFF
The first step to creating collection is to perfect the horse’s yield to the bit. Though basic, this first step is essential to achieving your goal.
From a walk, ask the horse to stop and back one step. The first cue, the pull, teaches the horse to yield to the bit. A proper yield is when the horse does not push against the bit when you pull, but rather drops its nose and poll, and yields to your direction.
“This number one step will help with horses that push out when asked to stop,” Deary says. “If the horse pushes [against me], I’m going to hold my hands until he finally says, ‘I’m sick of pulling,’ yields his face and backs one step. Then, I can let go.”
Release is the number one motivator for a horse to learn how to respond to a cue. A horse needs to know a release is coming, or he will learn to resent cues, Deary explains.
The repetition of the pull, yield and release will teach the horse to drop its head and neck when asked to stop, and the step back is the beginning of learning collection.
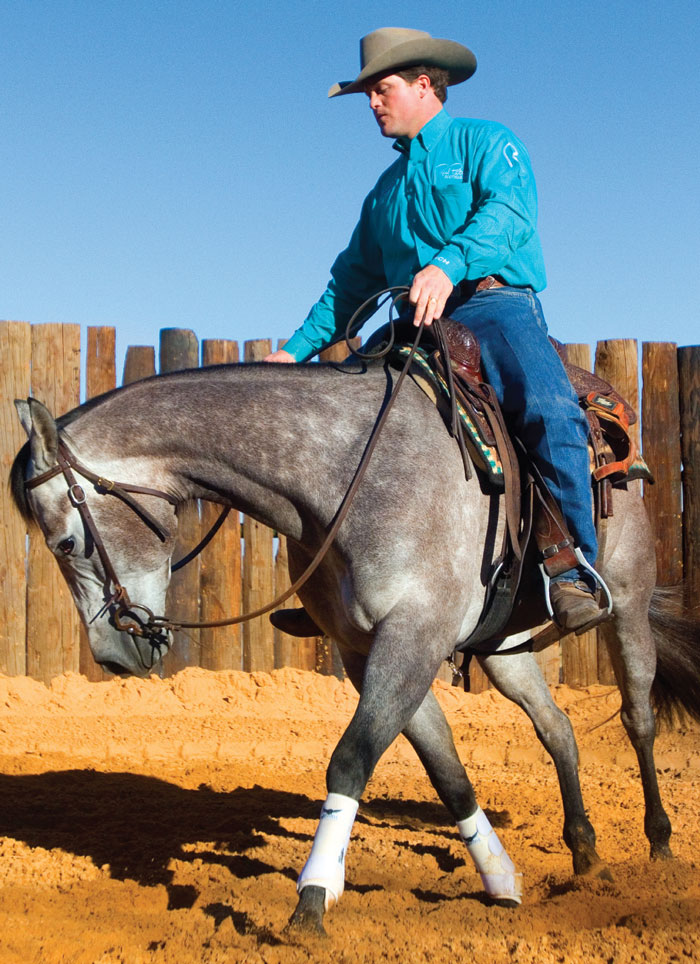
2. ENGAGE
The next step is to teach the horse to move forward with its head lowered, neck rounded and back elevated (see photo on previous page).
Using your legs to drive the horse forward, keep your hands at the same position as they were in Step 1—slightly raised in a manner that keeps the horse dropped at the poll and yielding to the bit.
“This is going to take a little effort getting the horse to go down with their neck and move forward,” Deary says. “It is always easier to get the shoulder elevated by going left or right [in a circle] be cause you break at the poll or the neck.”
To do this, continue to drive the horse forward with your legs, keep the pressure on its mouth, then lift one hand to begin walking a circle. Deary explains that circles can ease a horse into the exercise and eliminate initial confusion that may result from the new cue.
“I need that horse to understand that if it drops his head and neck, and moves forward, then I will release him,” Deary says. “I’ve initially taught the horse, in Step 1, to back off the barrier or pull, and in Step 2, I’ve taught it to push through the barrier [by moving forward while yielding]. You can’t skip Step 2, even though it is pretty basic.”
3. LIFT THE BELLY
“Once I have done Step 1, and Step 2 has established that same feeling with forward motion, I hold my legs in their belly until I feel the back round,” he says. “If your horse only wants to speed up [and not collect] in Step 3, that’s when you use the one rein and circle.
“If they want to go forward, I will keep the same pressure in their mouth and in the feet, but I will pull them into a tight circle and continue holding that same pressure with my hand. The horse thinks it is escaping that pressure by going forward [faster], so by going left or right [in a circle], you can elevate the shoulders and withers and lift their back. As soon as I feel the back elevate, then I release my hands and feet, and let them move straight again.
It takes consistent work for a horse to learn any maneuver, and collection is no different. Deary says some people try to shortcut the horse’s learning curve by switching to a bigger bridle or changing to a more severe curb strap. But that can be detrimental to the process.
“I don’t focus as much on their chin and face as I do on how their feet respond,” Deary says. “If you pull on your horse’s face, and all it does is tuck its chin but doesn’t change its stride at all, you get no benefit from that. Collection changes the stride of the horse.”
Casey Deary trains reining horses in Weatherford, Texas, is a NRHA Million Dollar Rider and has an Equi-Stat lifetime earnings report of over $1.3 million. For more information visit dearyperformance.com.